


Flickering shop fixtures and buzzing magnetic ballasts often disrupt indoor propagation benches right when seedlings require consistent illumination. Dimming phosphors and degraded gas mixtures lead to uneven canopy coverage, forcing indoor gardeners to address aging linear lamps. Understanding how to change fluorescent tube lights allows you to restore reliable illumination across seedling trays and workbenches without damaging delicate tombstone sockets. Many indoor gardeners choose to replace failing lamps with modern fixtures or high-efficiency tubes, similar to the setups explored in our guide on T5 HO grow lights for indoor propagation.
Upgrading or replacing older linear tubes requires careful attention to electrical safety, socket pin alignment, and ballast compatibility. Swapping old tubes for fresh daylight-balanced models restores proper photon delivery so tender microgreens and foliage plants avoid stretching. Selecting the right color temperature also plays a major role in plant vitality, which connects directly to understanding the best light spectrum for indoor plant growth across diverse species. Taking a systematic approach to fixture maintenance ensures stable lighting performance while protecting your indoor growing environment from sudden electrical failures.

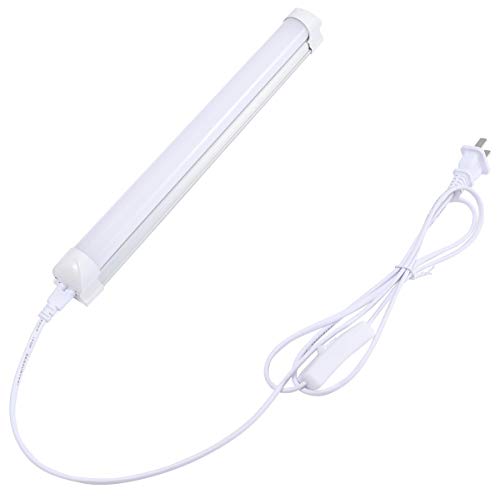
Replacing an exhausted linear fluorescent tube requires a systematic approach to physical removal, socket inspection, and electrical safety. Whether you maintain traditional fluorescent shop lights above seed flats or plan to transition older housings to modern light-emitting diodes, executing the swap properly prevents broken glass, damaged tombstones, and unexpected electrical shorts. Modern lighting retrofits allow growers to preserve their existing overhead fixtures while significantly increasing reliable photon output for indoor cultivation.
Electrical Isolation and Fixture Preparation
Safety begins by cutting power to the fixture at the primary service panel before touching the housing. Relying solely on an inline toggle switch can leave active line voltage at the socket if the circuit was wired on a switched neutral leg. Switching off the circuit breaker eliminates electrical shock hazards while handling exposed wiring or brittle tombstone sockets. Testing the housing with a non-contact voltage tester provides peace of mind before proceeding.
Working directly beneath ceiling-mounted or shelf-suspended light fixtures introduces physical hazards that require preparation. Setting up a stable step ladder ensures balanced footing while handling long glass tubes overhead. Wearing mechanic gloves and safety glasses protects your hands and eyes against accidental glass implosions. Inspect the exterior housing for dust accumulation, moisture buildup, or heat warping before reaching for the lamps.
Older fluorescent tubes contain small quantities of vaporized mercury sealed inside the glass envelope, making gentle handling essential. Never exert twisting force directly on the center of the tube where structural leverage can crack the cylinder. Placing a padded drop cloth beneath the fixture catches any falling hardware or debris during extraction. Preparing a clean, clear storage area allows you to lay down the removed lamps immediately without risking breakage.
Identifying Tube Form Factors and Socket Types
Linear fluorescent fixtures are categorized by tube diameter, which is measured in eighths of an inch across the glass barrel. Older workshop fixtures commonly utilize T12 lamps measuring one and a half inches across, driven by heavy magnetic ballasts. Standard residential shop lights frequently employ T8 lamps measuring one inch in diameter, which operate on electronic ballasts. Compact horticultural propagation systems generally depend on slim T5 tubes measuring five-eighths of an inch across.
Base pin configurations determine whether a replacement tube can physically seat into the existing end sockets, commonly called tombstones. Standard T8 and T12 lamps feature medium bi-pin G13 connectors with pins spaced thirteen millimeters apart. Slimmer T5 lamps utilize miniature bi-pin G5 connectors with five-millimeter spacing, requiring dedicated tombstones designed for their narrower diameter. Some industrial high-output linear fixtures utilize single-pin bases, which follow entirely different compression-mounting mechanics.
Examining the printed stamping near the metallic end cap provides crucial electrical specifications before purchasing replacements. The label typically indicates the rated lamp wattage, nominal length in inches or millimeters, and the color temperature code. Understanding these markings ensures you do not inadvertently install an incompatible tube that overtaxes the ballast or produces improper spectral output. Matching physical pin dimensions and wattage ratings prevents premature component failure and thermal stress.
Step-by-Step Fluorescent Lamp Extraction Procedure
Extracting a standard bi-pin fluorescent lamp requires a controlled quarter-turn rotation to align the brass pins with the vertical exit slot. Support the lamp with both hands spaced approximately two to three feet apart along the tube for balanced control. Gently rotate the tube ninety degrees until you feel the internal brass pins clear the contact clips inside each socket. You will often feel a distinct tactile release as the pins reach the vertical open channel.
Once the pins align with the socket slots, lower both ends of the tube downward simultaneously and evenly out of the fixture. Avoid pulling one end downward while the opposite end remains trapped inside its tombstone, as angled torque can snap the brittle socket. For spring-loaded sockets found in specialized fixtures, push the tube firmly toward the spring-loaded end until the opposing pin clears. Carefully lower the freed tube and place it directly into protective packaging or a designated recycling container.
Take time to inspect empty tombstone sockets for visible heat damage, discoloration, or structural cracking before installing a replacement lamp. Prolonged ballast heat can make older socket plastic extremely brittle over years of continuous operation. Look closely at the internal metal contact leaves to ensure they remain springy and free from oxidation or dark scorch marks. If a socket is cracked or loose, replacing the socket is mandatory to ensure dependable electrical continuity.
Ballast Compatibility and Direct-Wire LED Retrofits
Replacing traditional fluorescent tubes today frequently involves choosing between standard fluorescent refills and modern solid-state light-emitting diode retrofit tubes. LED replacements are broadly split into Type A plug-and-play lamps, Type B ballast-bypass tubes, and Type C remote-driver systems. Type A lamps operate directly from the existing electronic ballast, allowing instantaneous tube swaps without modifying the internal wiring harness. However, retaining an aging ballast means the system still consumes phantom wattage and remains susceptible to ballast failure.
Type B direct-wire LED retrofit tubes eliminate the ballast entirely, wiring line voltage directly from the building supply to the tombstone sockets. Bypassing the ballast reduces electrical resistance, cuts baseline fixture power consumption, and permanently eliminates humming or buzzing ballast failure modes. Direct-wire installations require determining whether the replacement tubes utilize single-ended power input or double-ended power connections. Double-ended tubes generally work with existing shunted sockets, whereas single-ended designs strictly require non-shunted tombstones to prevent direct short circuits.
Whenever executing a ballast-bypass conversion, cut the wires close to the ballast body and strip the conductor ends cleanly. Join the incoming hot and neutral wires to the socket leads using listed wire connectors, ensuring no bare copper remains exposed. Apply the safety warning sticker provided with the LED tubes inside the fixture housing to alert future operators that the ballast has been bypassed. This electrical conversion creates an efficient, maintenance-free fixture that operates coolly above sensitive indoor plants.
Installing New Tubes and Integrated Fixtures
Installing a replacement bi-pin tube involves reversing the extraction steps with careful attention to pin alignment and tactile locking. Hold the new tube horizontally with both hands, orienting the brass pins vertically so they slide smoothly into the tombstone entry slots. Guide both ends of the tube upward into the socket channels simultaneously until the pins seat fully at the base. Rotate the tube ninety degrees until the pins lock into the horizontal detent position, securing the lamp firmly against vibration.
Integrated LED linear fixtures present an appealing alternative to rebuilding obsolete fluorescent housings, offering self-contained units with pre-wired internal drivers. Compact options such as the 12inch 1200 LM LED Under Cabinet Light from Ledytech provide twelve hundred lumens of cool white illumination with an integrated power switch. These integrated units mount easily beneath plant shelving using included surface-mount clips, bypassing the need for separate ballasts or tombstones. Their straightforward plug-and-play architecture makes them ideal for targeted task areas or compact growing racks.
After seating any new tube or mounting an integrated linear fixture, gently grasp the body and apply light downward pressure to confirm physical engagement. A properly locked tube will not slip or twist freely in its sockets, ensuring continuous electrical contact under thermal expansion. Wipe down the exterior lens surface with a dry microfiber cloth to remove oily fingerprints that could trap heat or reduce luminous transmission. Once physical installation is verified, restore power at the service panel and test the fixture switch.
Horticultural Spectrum and Photosynthetic Performance
Swapping older fluorescent tubes provides an excellent opportunity to optimize the light spectrum for indoor plants, seedlings, and vegetative herbs. Standard commercial fluorescent tubes frequently emit a warm white spectrum around three thousand Kelvin, which lacks sufficient blue energy for compact vegetative growth. In contrast, daylight-balanced spectrums between six thousand and sixty-five hundred Kelvin supply elevated blue wavelengths that prevent stem elongation and promote tight internodal spacing. Specialized crops like growing bulb fennel under indoor light benefit immensely from high-kelvin daylight illumination during their initial vegetative development.
Fluorescent phosphors degrade steadily over thousands of operational hours, suffering notable lumen depreciation long before the tube visibly burns out. A tube that appears bright to human vision may have lost thirty percent or more of its initial photosynthetic photon flux density across the active canopy. Solid-state LED upgrades deliver much greater spectral stability over time, maintaining consistent photon delivery without the steep lumen decay characteristic of mercury-discharge lamps. Upgrading aging fluorescent arrays to modern diodes ensures your foliage receives the reliable light intensity required for active photosynthesis.
Balancing canopy coverage across indoor growing areas also requires understanding photon uniformity across the shelf footprint. Linear tubes naturally distribute light in a wide horizontal band, making them exceptionally effective for multi-tier seed racks and microgreen trays. Integrating modern high-efficiency linear fixtures helps maintain balanced Daily Light Integral values without generating hot spots directly below the center of the lamps. This consistent light distribution prevents outer foliage from leaning inward and ensures uniform growth across every tray.
Troubleshooting Flickering and Ignition Failures
When a newly installed fluorescent tube fails to light or exhibits rapid flickering, systematic troubleshooting isolates the fault quickly. Begin by checking the pin seating in the tombstone sockets, as an incomplete ninety-degree rotation prevents the contacts from closing the circuit. Turn off the fixture switch, gently rotate the tube slightly back and forth within its detent, and retest the power connection. If the lamp only illuminates near the ends while the center remains dark, the ballast may lack sufficient starting voltage.
Dark rings or blackened bands forming near the tube ends indicate severe electrode erosion, signaling that the tube has reached the end of its useful life. However, if a brand-new tube develops dark ends within hours of operation, a failing ballast or incorrect line voltage is likely overdriving the internal cathodes. In older magnetic ballast fixtures, a failed starter canister can also prevent the tube from striking, causing continuous clicking or rhythmic blinking. Replacing an inexpensive starter canister often resolves the issue, though converting the fixture to direct-wire LED eliminates these failure points.
Loose or corroded tombstone sockets represent another common source of intermittent electrical failure in humid indoor garden environments. Inspect the tombstone contact leaves to ensure they exert firm mechanical pressure against the lamp pins when seated. If the pins fit loosely or the plastic housing wiggles within its metal chassis cutout, replace the socket assembly before continuing operation. Maintaining clean, tight electrical connections prevents arcing, reduces operating heat, and ensures reliable lamp ignition every time the timer switches on.
Modern Flexible Lighting and Portable Tube Solutions
While stationary linear fixtures remain standard for overhead shelving, modern growers and creative hobbyists increasingly integrate versatile auxiliary lighting options. Portable solutions like the 2 Pack 4ft Portable Battery Powered Tube Light from leshiou offer internal rechargeable batteries, freestanding tripods, and extensive color effect capabilities. These handheld tube lights provide adjustable supplemental illumination in areas where fixed overhead electrical wiring cannot easily reach. Their cordless architecture makes them useful for side-lighting dense canopies, creative plant photography, or temporary workspace illumination.
Selecting between stationary linear retrofits and independent specialty fixtures depends on your structural layout and lighting objectives. Fixed overhead retrofits excel at delivering dependable daily photoperiods across uniform plant shelves, seed flats, and dedicated propagation setups. Meanwhile, multi-tier vertical arrangements like grow towers equipped with integrated lighting combine vertical space efficiency with purpose-built illumination arrays. Evaluating your specific mounting constraints and electrical capacity ensures you select the most practical linear lighting architecture for your indoor garden.
Regardless of whether you choose traditional tube replacements, direct-wire LED conversions, or integrated standalone utility bars, careful installation remains fundamental. Confirming proper pin engagement, eliminating failing ballasts, and matching spectral output to your plant species creates a reliable and energy-efficient lighting setup. Taking the time to properly service your linear fixtures protects your electrical circuits and ensures vigorous plant health across every growing season.





Write Your Review
No reviews yet. Be the first to share your experience!